This is a perfect Fun Craft for kids. Here is how you can make cute and easy Rabbit Face Mask or Easter Bunny Masks with your kiddos!
Supplies To Make Rabbit Face Mask
- Plain paper (I think white or pink would look cute)
- Blue marker
- Crayon
- Glue stick
- Scissors
How to Make Rabbit Face Mask for Kids
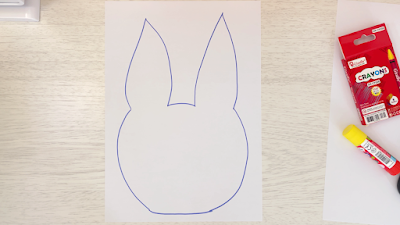
Step 1:
Start drawing rabbit ears. We start from the bottom and we’re going to draw a big long curved line. On the inside of that, we will do the oval shape which is a long circle. Then, do the round face shape for the head of our rabbit.
Now let’s draw the rabbit's eyes. Starting with the rainbow line at the bottom and a bigger rainbow line at the top and repeating the same thing for the other side. Do not fill anything inside the eyes because we will cut that out. So that eyes can fit into the hole.
All you have to do is fold your paper where the eyes are. Do not put your fingers behind where you’re cutting. Keep your fingers far away and take your time to go around the edge.
Keep our first paper on one side, and use another paper to create a rabbit’s nose.
Step 2:
Start drawing the round nose as big as you want on your paper because we want the mask to be able to fit on our face.
Now, we're going to draw the rabbit cheek and we’re using two curved lines upside-down rainbow line, and add numerous M shapes on the sides. Then, repeat the same on the other side. Don't forget to add the whiskers.
Now let’s add the rabbit teeth and we’re going to give them two big teeth. So, we start with a line down to the side and repeat the same thing on the other side. Then, make a middle line to join those two lines.
You can select what color you would like to put your rabbit ears or nose in our rabbit face mask. I’m just going to color the spears and nose with red or pink color. Use scissors to cut that space or around the edge.
Step 3:
Now, it’s time to use the glue to stick the nose to the face mask. So, what we’re going to do is add a small amount of glue to the back of the nose and we will stick it on the face mask paper. Now pat it down, pat pat pat...
Alright friends, you’re doing such an awesome job. You did it, friends!


Comments
Post a Comment